Integrating Auth0 with Wix Members allows you to easily add secure authentication and authorization to your Wix website. In this blog, we'll walk through the steps to set up Auth0 on your Wix site using the Wix Members App.
First, let's define what Auth0 is and how it can benefit your website. Auth0 is a cloud-based platform that provides a secure and easy-to-use solution for user authentication and authorization. It supports multiple authentication methods, including social login, single sign-on, and multi-factor authentication. With Auth0, you can easily add user registration, login, and access control to your website or application.
Now, let's get started with the integration process.
Step 1: Create an Auth0 account
To use Auth0 with your Wix site, you'll need to create an Auth0 account. Go to the Auth0 website and click on the "Sign Up" button. Follow the prompts to create your account.
Step 2: Create a new Auth0 application
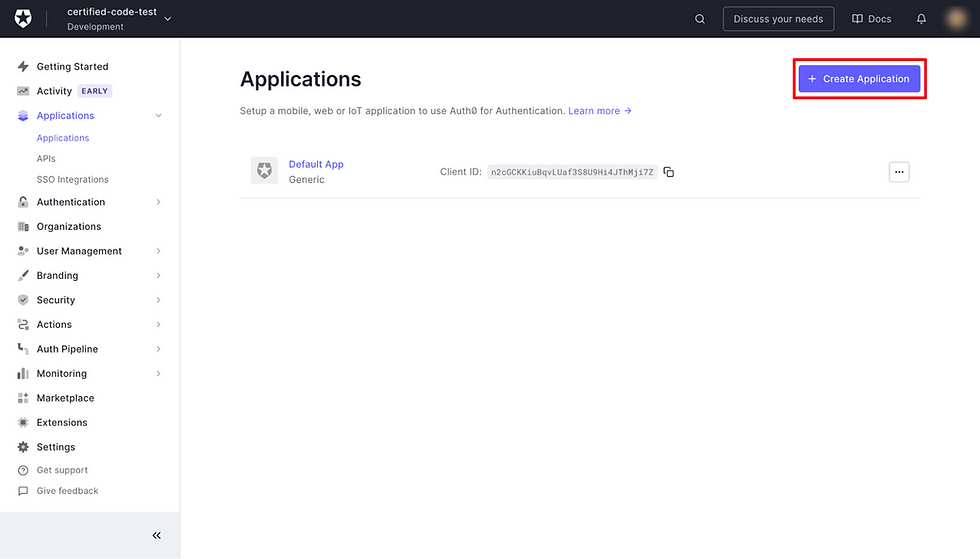
After you've created your Auth0 account, you'll need to create a new Auth0 application. To create a new application, click on the "Applications" menu in the dashboard, and then click on the " + Create Application" button.
If you already see "Default App", you skip this step.
Step 3: Configure the client settings
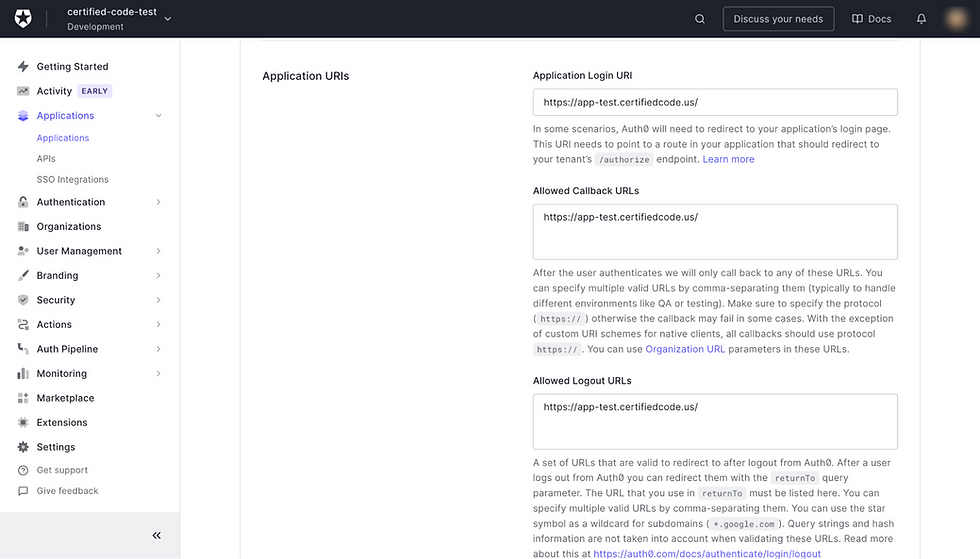
Next, you'll need to configure the client settings. Give your client a name, and select "Regular Web Applications" as the client type. Under the "Settings > Application URIs" section, add the URL of your Wix website. You can find this URL in the Wix editor under "Site Info" in the "Settings" menu.
Step 4: Install the Wix Members App
To integrate Auth0 with your Wix site, you'll need to install the Wix Members App. To do this, log in to your Wix account and go to the Wix App Market. Search for the "Wix Members" App and click on the "Add" button to install it.
Step 5: Adding a script to the Custom Code settings
After you've installed the Wix Members App, you'll need to set it up connections between the Wix website frontend and backend. To do this, go to your site dashboard, and go to settings > custom code (support article). Replace “YOUR_DOMAIN” and “YOUR_CLIENTID” with your own Auth0 information. Then, paste the code into <head> section.

<script src="https://cdn.auth0.com/js/auth0-spa-js/2.0/auth0-spa-js.production.js"></script>
<script>
    let auth0Client = null;
    let auth0Id = null;
    const configureClient = async () => {
        auth0Client = await auth0.createAuth0Client({
            "domain": "YOUR_DOMAIN",
            "clientId": "YOUR_CLIENTID"
        });
    };
    window.onload = async () => {
        await configureClient()
        updateUI();
        const isAuthenticated = await auth0Client.isAuthenticated();
        if (isAuthenticated) {
            return;
        }
        const query = window.location.search;
        if (query.includes("code=") && query.includes("state=")) {
            await auth0Client.handleRedirectCallback();
            updateUI();
            window.history.replaceState({}, document.title, "/");
        }
    };
    const updateUI = async () => {
        const isAuthenticated = await auth0Client.isAuthenticated();
        console.log({ isAuthenticated })
        const user = await auth0Client.getUser();
        fetch(window.location.origin + '/_functions/auth0/' + auth0Id, {
            method: 'POST',
            headers: {
                'Content-Type': 'application/json'
            },
            body: JSON.stringify({ user })
        })
        const token = await auth0Client.getTokenSilently();
        fetch(window.location.origin + '/_functions/auth0/' + auth0Id, {
            method: 'POST',
            headers: {
                'Content-Type': 'application/json'
            },
            body: JSON.stringify({ token })
        })
    };
    window.addEventListener('message', async (event) => {
        if (event.data.auth0Id) {
            auth0Id = event.data.auth0Id;
        }
        if (event.data === 'auth0:login') {
            await auth0Client.loginWithRedirect({
                authorizationParams: {
                    redirect_uri: window.location.origin
                }
            });
        }
        if (event.data === 'auth0:logout') {
            auth0Client.logout({
                logoutParams: {
                    returnTo: window.location.origin
                }
            });
        }
    });
</script>
Step 6: Configure the site code
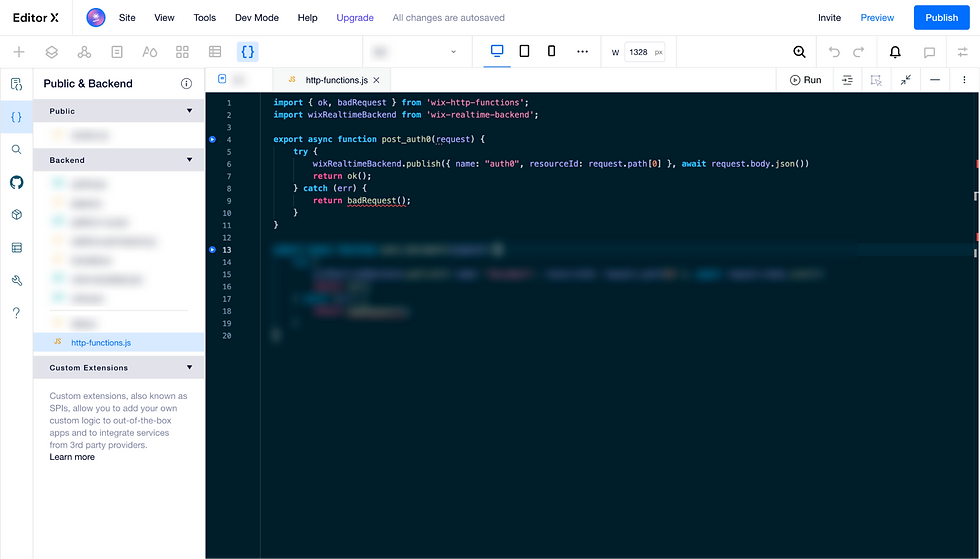
Next, you'll need to configure the Wix Members App to use Auth0 for authentication. To do this, open the editor (with Dev Mode turned on) and head to http-functions.js (documentation). If you have not created the file, please create one in your backend.
import { ok, badRequest } from 'wix-http-functions';
import wixRealtimeBackend from 'wix-realtime-backend';

export async function post_auth0(request) {
   try {
       wixRealtimeBackend.publish({ name: "auth0", resourceId: request.path[0] }, await request.body.json())
       return ok();
   } catch (err) {
       return badRequest();
   }
}
After the http-functions received request from the custom code we pasted in step 5, the request data is now shared to the frontend with the help of wix-realtime frontend and backend module (documentation).
Paste the following code on the masterPage.js to receive those data.
import wixWindow from 'wix-window';
import wixRealtime from 'wix-realtime';
import { v4 as uuidv4 } from 'uuid'
import { loginWithToken } from 'backend/auth0.jsw'
import wixMembers from 'wix-members';
var isLoggedIn = false;
$w.onReady(async () => {
   const member = await wixMembers.currentMember.getMember()
   isLoggedIn = !!member
   if (isLoggedIn) {
       $w('#login').label = "Logout"
   }
   const auth0Id = uuidv4()
   wixRealtime.subscribe({
       name: "auth0",
       resourceId: auth0Id
   }, (async message => {
       const payload = message.payload
       console.log({ payload })
       if (payload.token) {
           const token = await loginWithToken(payload.token)
           await wixMembers.authentication.applySessionToken(token)
           const member = await wixMembers.currentMember.getMember()
           isLoggedIn = !!member
           if (isLoggedIn) {
               $w('#login').label = "Logout"
           }
       }
   })).then(() => {
       wixWindow.postMessage({ auth0Id })
   })
   $w('#login').onClick(() => {
       if (isLoggedIn) {
           wixMembers.authentication.logout()
       }
       wixWindow.postMessage(isLoggedIn ? "auth0:logout" : "auth0:login")
   })
})
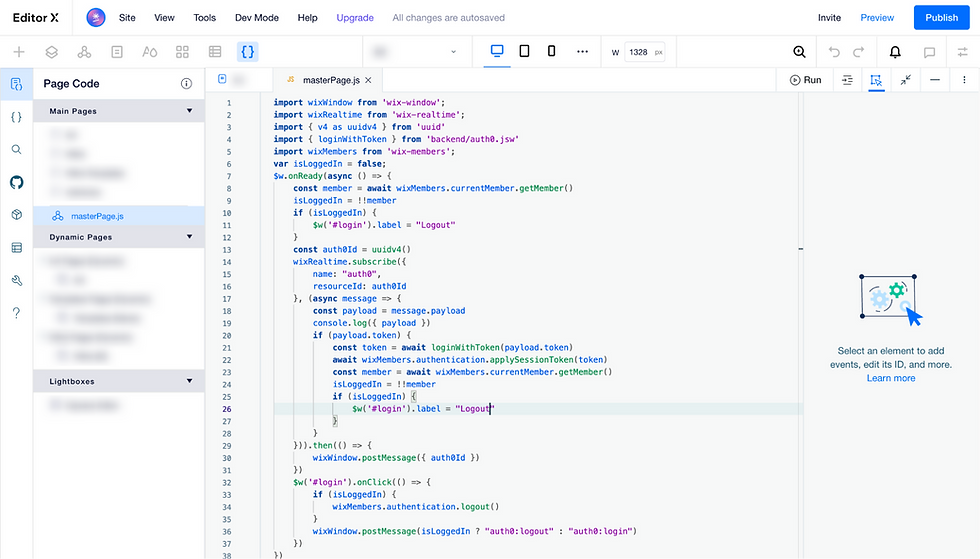
Pro tips: Replace “logout” and “login” with your own language (if the site is not in English)
Note: NPM dependencies used: uuid. Learn more about NPM packages in Velo.
After the frontend received the login token, pass it to a backend function to generate a session token, then return it to the frontend to sign in.
Paste the following code into your backend code file: “auth0.jsw” (if not exist, create one).
Replace “YOUR_DOMAIN” to your Auth0 domain.
var axios = require('axios');
import wixMembersBackend from 'wix-members-backend';
export async function loginWithToken(token) {

   var config = {
       method: 'get',
       url: 'YOUR_DOMAIN/userinfo',
       headers: {
           'Authorization': 'Bearer ' + token,
       }
   };

   const userInfo = await axios(config)
       .then(function (response) {
           return response.data
       })
       .catch(function (error) {
           console.log(error);
       });
   return wixMembersBackend.authentication.generateSessionToken(userInfo.email)
}
Step 7: Add the login button to your Wix site
Finally, you'll need to add a login button to your Wix site so that users can log in with their Auth0 credentials. To do this, go to the Wix editor and add a "Button" element to your header/footer. In the button's settings, change the text to “Login (or “Login” in your language)”.
Then, set the ID of the element to ‘login’.
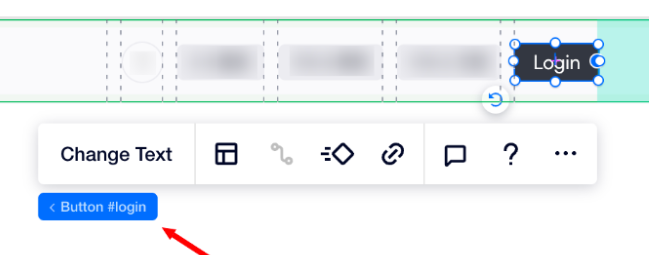
Pro tips: If you don’t wish to use ‘login’ as the button ID, please change the code element ID accordingly.
What’s behind that?
The mechanism in short:
Create a Auth0 client in Custom Code
Open up a "port" to login/logout (onMessage())
Call "auth0:login" / "auth0:logout" from masterPage.js via wix-window API > postMessage()
Auth0 client will bring user to login page, and return back to the site with parameters in the url
Custom Code will handle the login and get the token (and user info if needed) and send to http-functions. ("auth0Id" in Custom Code and masterPage.js is used to match user when using Realtime API, you can treat it as a unique identifier)
http-functions received the token and send to masterPage.js via Realtime API.
masterPage.js received the token and send to auth0.jsw to generate session token.
To generate a session token, fetch user information from Auth0 /userInfo endpoint (documentation), then, we have the user email to generate a session token and return to the frontend to signin.
The user is now signed in, and created in Wix Members if not exist.
Note: Wix creates a new member if the email is not registered in Wix Members. You don’t have to create a new member before generating a session token.
That's it! You've successfully integrated Auth0 with your Wix Members App. Now, members can easily log in to your website via Auth0, and you can easily manage access control and user permissions using the Wix Members App. If it is helpful, please "like" this post.
I hope this tutorial has been helpful in showing you how to integrate Auth0 with your Wix website. If you have any questions or need further assistance, feel free to reach out.


I believe I am missing a few steps here. The Login button does nothing for me. I do see the auth0 request but without a way for a user to sign up or login it is not working.
The code does not behaves well for me. Especially the custom header code.
updateUI is sometimes called while there is no registered auth0Id
Instead of calling it in window.onload, (I commented out this line), I'm calling it immediately after we get the auth0Id from window.addEventListener('message', async (event) => {
Also I had to change the 'Token endpoint authentication method' in Auth0 to 'None', otherwise I kept getting 401 errors from auth0. Don't if this is correct though from a security perspective
Could you please test this and update the tutorial accordingly if relevant?
Thanks,
Hi,
Thank you for this guide. I feel like I am missing something though. Do I need to change the way `auth0Id` is being generated for it to work?
Currently with the custom code, on load, 2 POST requests are sent to the API (http-functions), one with the user information and one with the token. The issue is that they are sent with a null `auth0Id` so a resource that does not have any subscriber.
The `auth0Id` is only set once the masterPage code is executed and once it is there is no API call anymore.
Thanks for the tutorial! Super helpful to get started. I am running into an issue where I am not being redirected to enter my credentials with Auth0. I see in the logs with Auth0 that WIX and Auth0 are exchanging data as Auth0 reports 'Failed Silent Auth; Login required'. Using a different browser with a session already established with Auth0, Auth0 logs report 'Success Silent Auth; Successful silent authentication' but then promptly reports 'Failed Exchange; Unauthorized'.
In neither case do I see the change in state of the login button change the text from 'Login' to 'Logout' as referenced in Step 6. Any ideas as to why I wouldn't be getting to the Auth0 login page to enter credentials?
Thanks! How about user signup? How is the data synced/shared between Auth0 and Wix members?
Ahhh! Just seeing this. Thank you so much Wing for sharing your knowledge with the community 🌟
Thanks Wing!!!